简体中文 | English
Guide to Bimanual Data Acquisition V2.0
Bimanual data acquisition V2.0 mainly uses SUB-1G wireless frequency pairing for data collection.
Precautions
- After each power-on, manually configure RF synchronization for bimanual tasks. Data acquisition can start after the configuration is complete.
- When multiple groups of devices operate in the same area, devices in the same group must use the same frequency band and sync word. Different groups should use different frequency bands and sync words to avoid interference.
- After confirming that configuration is successful, return to the home screen and check whether the corresponding left/right gripper icons and signal-strength bars are displayed at the top of the page.
- During actual acquisition, after starting recording, keep both devices parallel, looking at the same forward area, and stationary for about 3 seconds before operating. At the end of recording, it is recommended to return to the shared field-of-view area.
- After pairing succeeds, only the host device can start and stop recording for both devices. Before recording, confirm that the SD card is inserted and can be recognized normally.
1. How to Pair on the Interface
1.1 Open the RF Synchronization Configuration Page
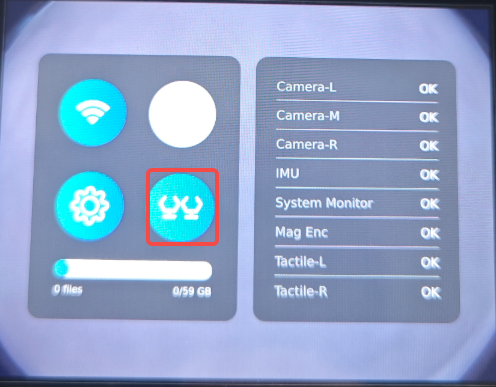
Pull down on the device home screen and long-press to enter the RF synchronization configuration page.
1.2 Select a Pairing Method
Select either pairing method.
Automatic Pairing
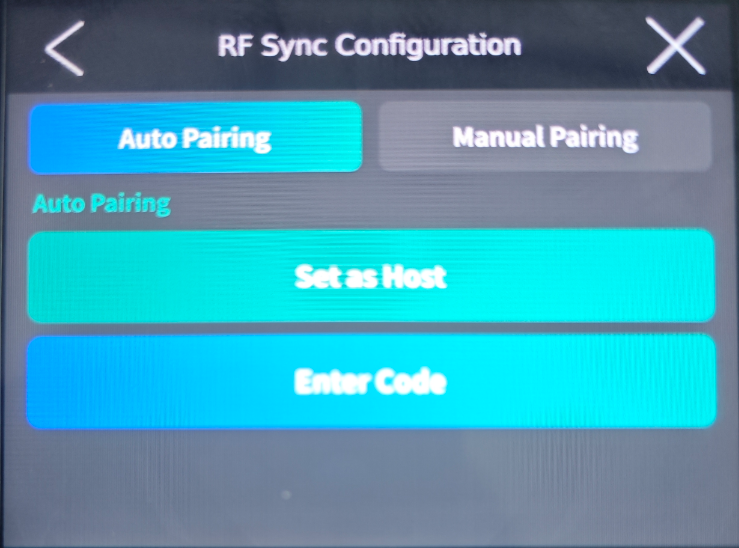
- Use the left-hand device as the host and tap Set as Host. The host device automatically generates a device identification code.
- Use the right-hand device as the slave and tap Enter Identification Code.
- Enter the identification code from the host device. After confirming that it is correct, tap confirm to connect.
- Wait for the pairing result. After pairing succeeds, the interface displays signal-strength bars. Return to the home screen, where the corresponding left/right gripper icons appear at the top.
Manual Pairing
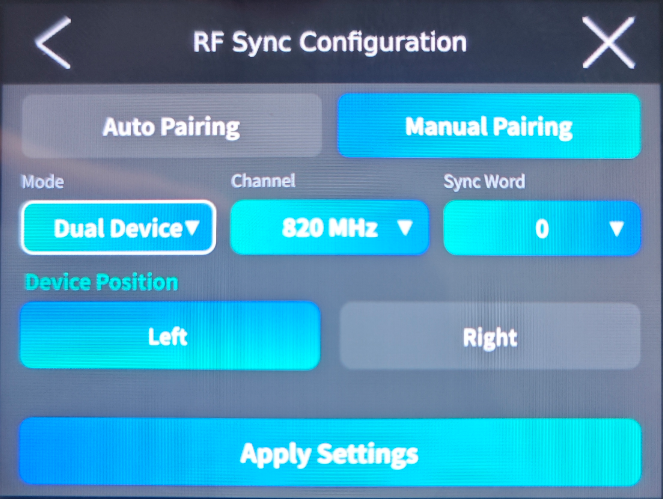
- Use the left-hand device as the host. Set the mode to dual-device mode, set the device position to left, and select a frequency band and sync word.
- Use the right-hand device as the slave. Set the mode to dual-device mode, set the device position to right, and select the same frequency band and sync word as the host.
- After both devices are configured, confirm that the frequency band and sync word are identical on both devices, then tap confirm configuration.
- Wait for the pairing result. After pairing succeeds, the interface displays signal-strength bars. Return to the home screen, where the corresponding left/right gripper icons appear at the top.
2. How to View Recorded Data
Open the settings page on the device and tap Recorded File Management to view the list of recorded MCAP files.
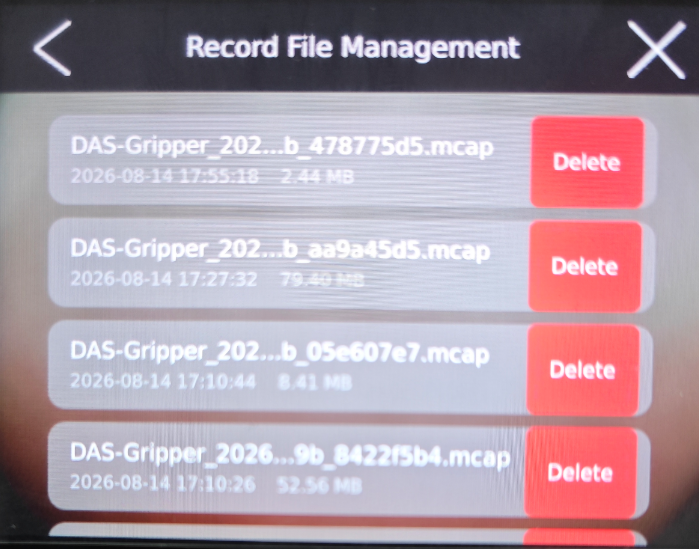
Raw data from the same group has the same recording start timestamp and is paired using a unique group_uuid.
Example file names:
| Device | Example |
|---|---|
| Host | DAS-Gripper_20260730171250_master_left_cf3169_31f27d19.mcap |
| Slave | DAS-Gripper_20260730171250_sub_right_00b579_31f27d19.mcap |
Here, 31f27d19 is the UUID segment of this data group.
Raw Data Export
Remove the SD card used for recording, and use the standard card reader to copy the recorded MCAP files to a computer.
Use https://monitor.genrobot.com/#/index to open local MCAP files for data visualization.
3. How to Use Studio to Process Bimanual Data
- Studio tutorial: Matrix Studio Manual